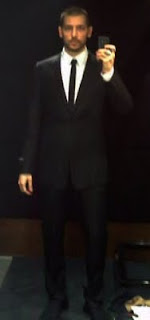
The first part of the first semester that is and what a dusey it's been. Just had Thanksgiving and I swore I would take a break from fashion but really have no desire to loaf anymore. Hopefully I’ve eaten enough though because I weight 149 lbs at 5'11" now. I guess that's what FIT's Menswear program will do to you haha.
Anyway, by far, Patternmaking was the most time consuming class (note the circles under my eyes below). In a nutshell, all clothes must be cut from fabric rolls in shapes and patternmaking teaches you how to make and modify those shapes to get what you what. We had been working on our final shirt for quite some time. The way I took the assignment was to LEARN the most in making it. To be quite honest, I believe I could have made a shirt that appeals to me much more. For example, I HATE ruffles on men’s clothing usually. But I sandwiched a ½” ruffle between the yoke on my shirt just for practice and to understand them better. And I LOVE pleats but what would I have learned by folding fabric back and forth ad nauseam.
The shirt is a festival of interesting things. Here’s what’s unique about each piece and what I learned:
COLLAR: Fabric doesn’t naturally curve around the front of the neck. This collar is cut in the same way a yoke on a pair of pants is to give it shape. It took seven tries to get right. One of the most frustrating parts on the shirt.
YOKE: Ruffles in the middle of back. Making ruffles requires a gentle touch, something I don't naturally have. Use abnoxiously strong thread next time.
The real craziness on this shirt is the dimension, or 3-D shape, on the shoulder. No matter how strong the interfacing is, always stuff dimensions with cotton or else over time, it will collapse, as mine began to after a few weeks of movement.
The six twirling, pressed tubes of pleats on top were very time consuming to make but I love the way they look and can imagine a lot of wicked stuff done with this.
SLEEVES: The wavy pleats… good God, they took about 15 hours from drafting the pattern on paper to be translated and sewn into the sleeve. Every 4 inches, the ½” pleats were turned back ¼” which gave a wavy effect when it was repeated. Also this piece was set in the bottom in a shape that ended in a point, so the seam allowance got progressively smaller until right at the bottom of the point, there was none, which presents a problem. I made it work though ;)
CUFF: No placket. French cuff where the edge doesn’t extend past the sleeve. Has to be fed through the sewing machine in a circle like a Ferris wheel.
FRONT: The shirt is closed via internal magnets stitched into the plackets. Hey, just for fun, see if you can stitch magnets into a fabric on a metal sewing machine. I dare you. They’re in there because I’m creative as fuck, not because I have impeccable technical skills.
On one late night in the studio with my friend Jess, we were talking about our shirts, and she said the fabric was her friend. I thought of it the opposite way. The fabric is my enemy and I have to go toe to toe in the ring until I mold and manipulate it into what I want it to be.
Being a good artist is as much about being able to emotionally handle failing a ton in getting what you desire but still compromising as little as possible in your vision. When you have to do something over and over again, you will ultimately see shortcuts, which sometimes leads to innovation and other times leads to shoddy quality. While I do have a good work ethic, in a lot of ways I am lazy, obsessed with efficiency and want to expend the least amount of energy possible. I’ve heard it said, if you give the hardest job to the laziest man, he’ll find an easier way to do it. Food for thought…


